




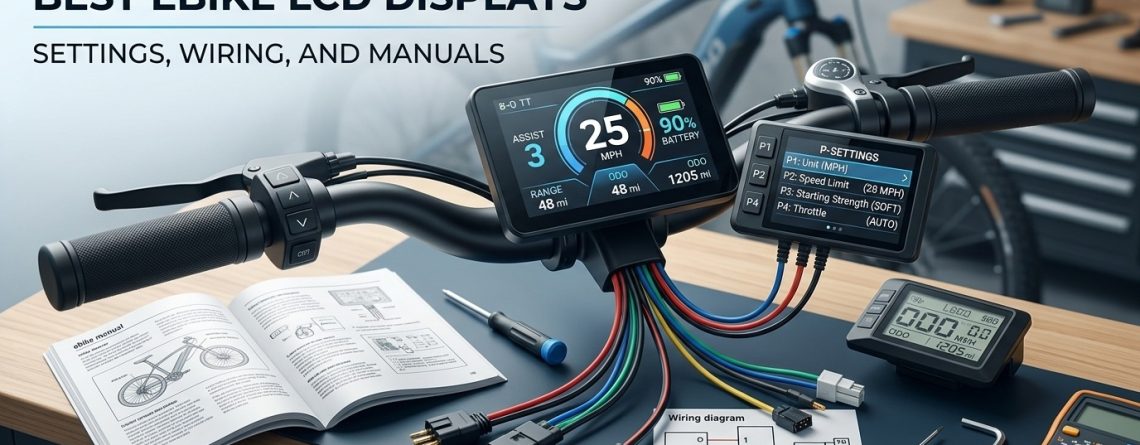
The Ultimate Guide to the Best Ebike LCD Displays: Settings, Wiring, and Manuals
What is an ebike lcd? An ebike lcd (liquid crystal display) is the central control unit and “dashboard” of an electric bike. It communicates with the motor controller to provide real-time data including current speed, battery voltage, odometer readings, and pedal-assist levels, while allowing riders to customize performance via internal programming.
To be honest, I’ll never forget the first time my ebike lcd screen went dark in the middle of a rainy commute. One second, I was cruising at 20 mph, checking my battery levels; the next, I was staring at a blank piece of plastic, guessing how much “juice” I had left to get up the final hill. It wasn’t just a convenience—it was my connection to the bike’s brain.
Whether you’re looking for a replacement ebike lcd screen or you’re a DIY builder trying to figure out ebike lcd display wiring, you’ve probably realized that these little screens are surprisingly complex. You know, it’s not just about seeing your speed; it’s about having a programmable e-bike display that lets you unlock the true potential of your motor. In my case, a simple setting tweak on my lcd ebike display once added five miles to my range just by optimizing the power delivery.

Visualizing your ride: A clear ebike lcd makes all the difference in safety and performance.
Why the Right Ebike Display Matters
Actually, many riders treat their e-bike control panel as an afterthought. But think about it: if your bicycle electric display is hard to read in direct sunlight or doesn’t accurately reflect your 48v electric bike lcd voltage, you’re riding blind. Have you ever wondered why your battery indicator jumps from three bars to empty suddenly? Often, it’s a calibration issue within your ebike computer display settings.
Is your display acting up?
Before you buy a new one, check out our troubleshooting section below to see if a simple reset can save your ebike display screen.
Understanding Your Electric Bike LCD Display 💡
When you start looking at an electric bicycle lcd display, you’ll see a lot of technical jargon. In my experience, the most important factor is compatibility. A universal ebike lcd display sounds great on paper, but if the communication protocol (like UART or CAN bus) doesn’t match your ebike lcd controller, you’ll just end up with an error code.
Voltage Compatibility: The 48V Factor
I get asked a lot: “Can I use a 52V battery with a 48v ebike lcd display?” The short answer is: maybe, but your battery meter will be wrong. Most lcd display for electric bike units are programmed for specific voltage curves. If you’re using a 48v electric bike lcd, it expects the “full” signal at 54.6V. Anything else, and you’re just guessing your remaining range.
| Feature | Standard LCD | Color LCD Display | LED Control Pad |
|---|---|---|---|
| Visibility | Good (High Contrast) | Excellent (Vibrant) | Poor (Simple Lights) |
| Data Depth | Full (Speed, Odo, Trip) | Advanced (Wattage, Temp) | Basic (Assist Level) |
| Durability | High | Medium | Very High |
| Price Range | $30 – $60 | $70 – $130 | $15 – $30 |
💡 Pro Tip: The “Waterproof” Myth
Even if your waterproof ebike lcd display has an IP65 rating, I’ve found that heavy, horizontal rain can still find its way into the ebike lcd display wiring. I always recommend a small plastic cover or even a bit of electrical tape around the connector seams if you’re a year-round commuter.
Expert Q&A: The Wiring Puzzle
Q: Can I just cut and splice my ebike lcd display wiring?
A: I wouldn’t recommend it unless you have a user manual ebike lcd display manual with a pinout diagram. Most modern ebike display units use a 5-pin green Higo connector. Messing up the “VCC” and “Ground” wires can instantly fry your ebike lcd controller. Trust me, I’ve seen the smoke!
Q: What should I look for in a replacement ebike lcd screen?
A: Look for the connector type (Julet vs. Spade), the voltage compatibility (e.g., ebike lcd display 48v), and whether it supports the “P-settings” you need to adjust your top speed or tire size.
How to Program Ebike LCD Display Settings ⚙️
This is where the magic happens. You’ve probably seen the “P-settings” in your ebike lcd display manual. These are the hidden menus that let you hack your ride. When I first accessed the ebike lcd display settings on my bike, I realized the manufacturer had set the wheel size incorrectly, making my ebike speedometer display read 10% faster than I was actually going!
Common P-Settings (A Quick Reference)
- P01: Backlight Brightness (Level 1-3)
- P02: Unit of Measure (0 for KM, 1 for Miles)
- P03: Voltage Class (24V, 36V, 48V)
- P08: Speed Limit (0-100km/h – set to 100 for “unlimited”)
- P14: Controller Current Limit (Amps)
Before you start changing things, make sure you have your ebike lcd display manual handy. If you change the wrong parameter, your bike might not start at all. If you’ve lost yours, many riders search for “universal ebike lcd display manual” online to find generic defaults that work for 80% of Chinese-made controllers.
Choosing a 48v Ebike LCD Display for Your System 🚀
If you’re upgrading, you want the best ebike lcd display that balances features and price. Here are a few configurations I’ve personally tested and found reliable for daily use.

C965: Popular For BBS
Specs: 36V-52V Compatible, UART Protocol.
- Pros: Extremely durable, cheap to replace.
- Cons: Monochrome screen, basic interface.
- Best for: Reliable daily commuting

The High-Tech Color Display
Specs: 36V-52V Support, Full Color TFT.
- Pros: USB charging port, beautiful UI.
- Cons: More fragile.
- Best for: High-performance DIY builds.
A Note on Replacement
When you replace ebike lcd screen units, always check the plug. A “Male” vs “Female” connector is the difference between a 5-minute job and an afternoon of soldering. Most ebike lcd display parts aren’t interchangeable across different brands, even if they look identical!
Troubleshooting: What to Do if Your Ebike LCD Display is Not Working 📖
It happens to the best of us. You press the power button and… nothing. Before you panic and buy a new ebike lcd display, try these steps that have saved me a hundred dollars more than once.
Why is my ebike LCD display not working?
Usually, it’s one of three things: a loose ebike lcd display wiring connector, a blown fuse in the battery, or a “sleep mode” glitch. Unplug the main display cable (usually the green one), check for bent pins, and plug it back in firmly. You’d be surprised how often road vibrations wiggle these loose.
How do I reset my ebike LCD?
Most ebike display screen units can be reset by holding the “Up” and “Down” buttons simultaneously for several seconds. If you need to factory reset the ebike lcd display settings, look for a “DEF” or “Reset” option in the advanced P-menu (usually P16 or P11 depending on the model).
Is my ebike lcd waterproof?
Most are water-resistant (IP64/65), meaning they handle light rain fine. However, if you see fogging inside the e-bike screen, it means the seal has failed. I usually dry it out with silica gel packets and then add a bead of clear silicone around the edge.
Can I add a display to a bike that didn’t have one?
Only if your ebike lcd controller has a dedicated display port. If it’s a “brainless” controller, you’ll need to replace both the controller and the lcd display for ebike as a matched kit.
Wrapping up, your ebike lcd is more than just a speedometer; it’s the heart of your riding experience. By understanding your ebike lcd display manual and knowing how to tweak your ebike lcd display settings, you’re not just a rider—you’re a power user.
References & Further Reading:
This article shares expert experiences and was organized with AI assistance. Always follow your manufacturer’s safety manual before modifying wiring.








LEAVE A COMMENT