




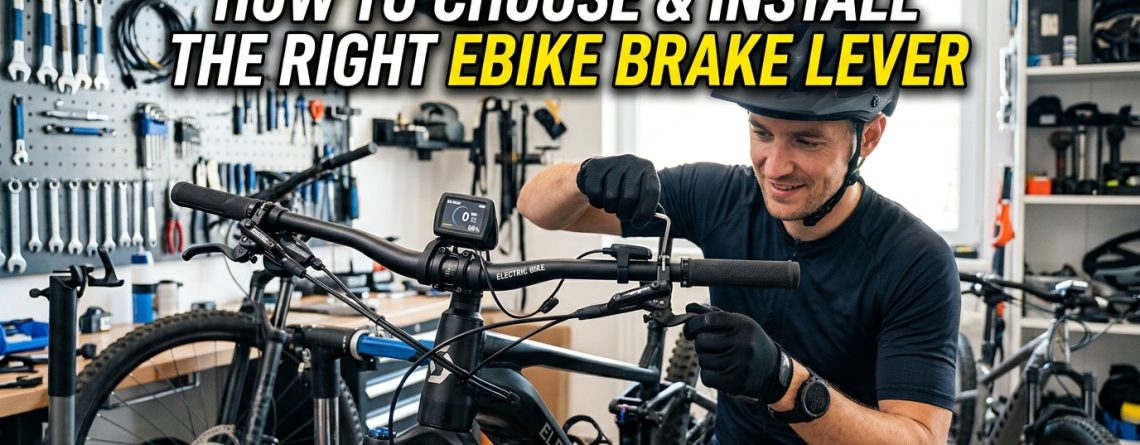
How to Choose & Install the Right Ebike Brake Lever
An ebike brake lever is an essential safety component on an electric bicycle designed to engage the mechanical or hydraulic brakes while simultaneously triggering a motor cutoff sensor.
This built-in brake inhibitor instantly cuts power to the ebike controller, overriding throttle or pedal-assist engagement to safely bring high-speed bikes to a complete stop.
To be honest, I never really gave my electric bike brake handle much thought—until I found myself carrying far too much speed into a tight urban turn on a rainy morning commute.
When I squeezed the lever, the hydraulic pads clamped down smoothly, and the motor instantaneously cut out. That split-second power disengagement saved me from skidding out across a slick painted crosswalk. It was a stark reminder that stopping an electric bike involves far more kinetic energy than stopping a standard pedal cycle.
Electric bikes typically weigh anywhere between 45 and 80 pounds (20 to 36 kg) and effortlessly cruise at speeds exceeding 20 to 28 mph (32 to 45 km/h). Electric motors generate persistent torque through pedal-assist (PAS) algorithms or throttle inputs. This means that applying traditional mechanical stopping force alone is simply not enough. You need an integrated system designed explicitly for electric rides.

Figure 1: Close-up view of a replacement ebike brake lever showing integrated wiring and waterproof connector types.
⚡ What Makes an Ebike Brake Lever Different?
An ebike brake lever functions as both a mechanical stopping actuator and an electrical cutoff switch that instantly cuts motor power. Standard bicycle levers simply pull an inner stainless steel cable or push hydraulic fluid through a flexible line to actuate calipers. While an ebike brake lever replacement performs those exact mechanical tasks, it also houses an integrated electrical switch—often referred to as an ebike brake inhibitor sensor—that signals the main electronic controller to instantly pause power output.
If you’ve ever wondered, “Can I use MTB brake lever to ebike setups?” the short answer is usually no—unless you manually install an aftermarket inline magnetic cutoff sensor kit. Standard mountain bike levers lack internal wiring to communicate with your motor controller. Without a working cutoff switch, your motor might keep pushing power against your brake pads if you happen to bump the throttle or if pedal assist delays its disengagement by a fraction of a second, leading to accelerated brake pad wear, motor overheating, or extended stopping distances.
💡 Integrated Motor Cutoff Switches: Hall Effect vs. Mechanical Micro-Switches
Inside an ebike brake lever with motor cutoff, power disengagement is managed by one of two underlying technologies:
- Mechanical Micro-Switches: These utilize a physical spring-loaded button inside the lever housing. Squeezing the lever releases or presses the switch, physically breaking or opening the electrical circuit. While cost-effective and reliable on standard cable-actuated systems, micro-switches contain small mechanical moving parts that can wear down or corrode over thousands of wet weather miles.
- Hall-Effect Electronic Sensors: Popular in modern high-performance setups, Hall sensors use a small magnet in the lever. A fixed magnetic sensor sits inside the housing. When you pull the lever, even by a few millimeters, the magnetic field shifts right away.This instantly changes the signal voltage sent to your motor controller. Hall sensors feature zero moving electrical contact points, offering completely sealed waterproof operation and long-term durability.
Is Your Stopping System Feeling Spongy or Delayed?
A failing sensor or incorrect lever reach can significantly compromise your stopping power and rider safety.
🌱 Hydraulic vs. Mechanical Ebike Brake Levers
Choosing between hydraulic and mechanical cable levers depends on your riding speed, system weight, and maintenance preferences. During my long-term tests on heavy-duty fat tire cargo bikes and light commuter builds, the differences were clear. Lever modulation, lever effort, and sensor integration all proved substantial.
Cable-actuated ebike brake levers use a traditional woven steel inner cable inside a spiral-wound outer casing. Pulling the lever translates directly to mechanical cable tension that pulls the caliper arm shut. They are straightforward to adjust using barrel adjusters and cost less to replace. However, heavy electric bikes quickly expose their limitations: cable stretch, housing friction, and increased hand fatigue on long downhill descents.
Conversely, ebike hydraulic disc brake levers move fluid through sealed hose lines into multi-piston calipers. Squeezing a hydraulic lever requires minimal effort while delivering significantly superior stopping force and linear lever modulation. Most modern hydraulic levers feature factory-integrated Hall-effect electronic sensors hidden completely inside the master cylinder body.
| Feature / Spec | Mechanical Cable-Actuated Lever | Hydraulic Disc Brake Lever |
|---|---|---|
| Stopping Power & Efficiency | Moderate; requires firmer finger pressure | High; light 1-to-2 finger lever actuation |
| Sensor Integration | External micro-switch or inline sensor | Internal sealed Hall-effect switch |
| Maintenance Requirements | Frequent cable tensioning & housing checks | Periodic hydraulic system bleeding (1–2 yrs) |
| Common Connector Types | Standard 2-pin waterproof or spade terminals | 2-pin / 3-pin waterproof molded connectors |
| Average Unit Cost | $15 – $35 per pair | $45 – $120+ per pair (with caliper) |

Figure 2: Internal component layout of mechanical micro-switch levers versus sealed hydraulic Hall sensor master cylinders.
🚀 Top Factors to Consider Before Buying
Wiring Connectors: 2-Pin vs. 3-Pin Waterproof Harnesses
Before ordering an ebike brake lever replacement, inspect your bike’s existing wiring harness connectors. Connecting an incompatible plug can lead to non-functioning cutoff sensors or require tedious custom soldering.
- 2-Pin Waterproof Connectors (Typically Red Julet): Operating as a simple “Normally Open” or “Normally Closed” electrical switch circuit. When the lever is pulled, the circuit alters its connection state to alert the controller.
- 3-Pin Waterproof Connectors (Typically Yellow Julet): Frequently utilized for Hall-effect electronic sensors. The three pins supply positive 5V power, ground, and a dedicated signal wire back to your system’s motor controller.
Handlebar Diameter & Lever Reach Adjustment
Virtually all standard electric bicycle handlebars feature a uniform 22.2mm handlebar clamp diameter at the grip area. However, always double-check your bar measurements if you ride specialized swept-back handlebars or custom setups.
Furthermore, look specifically for an adjustable brake lever handle ebike model. An integrated reach adjustment screw allows you to dial in the distance between the handlebar grip and the lever blade. This is a crucial feature for preventing hand fatigue during long rides and accommodating smaller hand sizes.
Free-Travel Distance & Lever Alignment
Proper ebike brake lever free travel adjustment ensures that your motor cutoff sensor triggers within the initial 2mm to 5mm of lever pull. This is well before the brake pads clamp down firm against the rotor. If your lever travel is overly loose, your motor might continue driving forward. And that can happen even while pads press against the rotor, causing unnecessary mechanical strain.
📖 Step-by-Step Ebike Brake Lever Replacement & Adjustment
Replacing a worn or damaged electric bike brake handle is a manageable DIY workshop task if you follow a methodical process. Here is how I replaced a bent right ebike brake lever on my commuter bike following a garage tipping accident:
- Disconnect the System Power: Power off your electric bike and fully remove the main battery pack to eliminate electrical shock hazards or accidental motor spin-ups.
- Unplug the Sensor Cable: Locate the inline wiring harness connector near your handlebars (typically a color-coded 2-pin red or 3-pin yellow Julet fitting) and pull it straight apart without twisting.
- Release Cable Tension or Bleed Line: For mechanical systems, back off the barrel adjuster and slip the inner stainless brake cable out of the lever perch. For hydraulic systems, unbolt the hose compression fitting or disconnect the quick-connect port carefully.
- Loosen Handlebar Clamp Bolts: Remove your handlebar grip, loosen the 4mm or 5mm Allen clamp bolt on the underside of your old lever perch, and slide the assembly off the 22.2mm bar end.
- Mount and Orient the Replacement Lever: Slide your new left ebike brake lever or right lever onto the bar. Lightly snug the clamp bolt while keeping the lever angled downward roughly 35 to 45 degrees to match your natural arm posture.
- Reconnect and Adjust Free Travel: Reattach your sensor plug securely, ensuring arrow alignment markers line up. Dial in the reach adjustment screw so your index and middle fingers rest comfortably on the lever blade blade surface.
Figure 3: Adjustment points for lever reach, free travel distance, and handlebar ergonomics.
💡 Common Troubleshooting: Motor Cutoff Failures
If your electric motor fails to shut off when squeezing your brake lever, or if your pedal-assist stops working entirely, your brake inhibitor sensor circuit is likely giving improper signals:
- Motor Stays Powered When Braking: Check for a disconnected, dirty, or loose 2-pin/3-pin harness plug. On mechanical levers, verify that the micro-switch push-pin isn’t stuck inside its socket from road grime.
- Ebike Won’t Turn On or Throttle Unresponsive: The motor controller may think the brakes are continuously applied. This usually indicates a stuck micro-switch pin, a misaligned magnetic Hall sensor inside the lever perch, or moisture ingress inside the connector plug.
🔧 Expert Workshop Tip: When testing an ebike brake lever kit installation, always elevate your driven wheel off the ground using a bike stand before powering up the system. Gently apply throttle while squeezing the brake lever to verify that the motor cutoff cuts power immediately.
🔍 Recommended Ebike Brake Lever Configuration Options
Whether you need a full replacement for a damaged perch or want an ergonomic upgrade for better stopping control, consider these common setup configurations:
Mechanical Ebrake Levers
Ideal For: High-speed commuter and heavy fat-tire ebikes.
- Connector: 3-pin yellow Higo waterproof plug
- Clamp Fit: Standard 22.2mm diameter
- Pros: Inexpensive, BBS compatible
- Cons: Not compatible with hydraulic brakes
Push Button Ebrake
- Ideal For: Changing gears on middle motors.
- Connector: 3-pin yellow Higo waterproof plug
- Clamp Fit: Standard 22.2mm diameter
- Pros: Inexpensive, independent of brakes
- Cons: Only works with Higo connectors.
📖 Frequently Asked Questions (FAQ)
Can I replace just one ebike brake lever, or should I replace both as a pair?
You can replace a single left ebike brake lever or right ebike brake lever independently if only one perch is damaged. However, replacing them as a matched pair ensures consistent lever reach, identical lever modulation, and uniform wiring connector aesthetics across your handlebars.
How do I know if I need a 2-pin or 3-pin ebike brake lever replacement?
Unplug the color-coded connector located along your brake line near the handlebars and look at the internal pins inside the plug. A 2-pin plug (usually red) uses a basic contact switch, whereas a 3-pin plug (usually yellow) supplies power to an internal Hall-effect sensor. Always match your replacement lever to your existing controller connection type.
Why is my motor cutoff sensor failing to disengage power when I brake?
Motor cutoff failures typically stem from a loose wiring connection, dirt trapped inside a mechanical micro-switch, or a misaligned magnetic Hall sensor inside the brake perch housing. Cleaning the connector terminals and checking wire integrity usually fixes the issue.
Can I bypass the ebike brake inhibitor sensor entirely?
While an ebike will function mechanically without the cutoff sensors plugged in, bypassing them is strongly discouraged. Integrated ebike brake lever safety sensor systems prevent the motor from resisting your stopping force during panic stops and are crucial for safe operation.
What clamp size do I need for my electric bike brake handle?
Nearly all urban, mountain, and cruiser electric bikes use an industry-standard 22.2mm outer diameter handlebar clamp at the grip zone. Always double-check your handlebar specs before purchasing replacements.
🛡️ Maintenance Best Practices & Safety Precautions
To ensure long-term safety and crisp performance from your stopping hardware, carry out routine workshop checks every 300 to 500 miles (480 to 800 km). Keep your wiring harness free from tight zip-tie strain points around the headtube area to prevent wire shear during tight turns. Apply electrical contact cleaner to waterproof connectors if riding in salty coastal or winter environments. Always consult your ebike manufacturer manual and adhere to local ebike traffic regulations prior to undertaking major component modifications.
External References & Authoritative Reading
For additional technical background on electric bicycle brake servicing and safety standards, consider these industry resources:
- Park Tool Repair Help: Mechanical & Hydraulic Disc Brake Inspection & Servicing Guide
- Endless-Sphere EV & E-Bike Technical Forum: E-Bike Controller Wiring & Cutoff Sensor Compatibility
- Electric Bicycle Company: Electric Bike Brake Maintenance & Safety Standards Explained
Disclaimer: This comprehensive technical guide shares real-world workshop testing experiences and was organized with AI assistance to ensure thorough SEO and structural clarity. Always consult a certified bicycle mechanic if you are unsure about performing hydraulic brake bleeding or controller wiring modifications.



LEAVE A COMMENT