





Kit for Motorized Bicycle: The Ultimate DIY Guide
Have you ever looked at a steep hill on your commute and wished for a little extra power? I was there every single day. Instead of spending thousands on a new e-bike, I discovered a more rewarding path: building my own with a kit for motorized bicycle. This is my story of turning a standard bike into a hill-conquering machine, and how it transformed my daily ride from a struggle into a joy.
🚲 What Is a Kit for a Motorized Bicycle and How Does It Work?
My daily commute used to be a battle against a monstrous hill. I love cycling, but arriving at work drenched in sweat wasn’t the professional look I was going for. While I dreamt of an e-bike, the high price tags were a major hurdle.
That’s when I discovered a fascinating solution: the kit for a motorized bicycle. It was a promise of power, a fun DIY project, and a way to get an electric bike at a fraction of the cost.
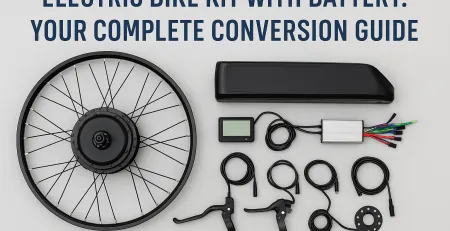
An electric bicycle conversion kit is a set of parts that can turn a regular bike into an electric one. The kit includes a motor, battery, and controller. These components form the heart and brain of an e-bike, and you can install them directly on your frame.
Think of it like this: your bike is the chassis, and the kit adds the engine. Here’s how the main parts work together:
- The battery acts as the fuel tank, storing the electrical energy.
- The electric bike motor is the engine, providing the push.
- The controller is the onboard computer, telling the motor how much power to use.
It sounded complex at first, but the more I read, the more it felt like an adult-sized LEGO set.

My weekend project laid out: It was less intimidating than it looked!
Looking for an electric alternative?
Thinking about switching from a motorized bicycle kit to an electric setup? Here’s what to compare—compatibility, basic install needs, and key checks before you buy.
Electric Bicycle Conversion KitsThe Core Components of Your Future E-Bike
Understanding what’s in the box is the first step. If you’re considering this project, here is a quick breakdown of the essential components I learned are in any quality kit.
ComponentFunctionMy Personal TakeawayElectric MotorProvides the propulsion (the “e” in e-bike).This is your biggest choice—it defines the bike’s personality.Battery & ChargerStores and supplies the power. Determines your range.Don’t cheap out here. A good battery is key to a reliable ride.ControllerThe “brain” that regulates power from the battery to the motor.A smooth controller makes for a smooth, predictable ride.Throttle/SensorsYour interface for controlling the motor’s power.Thumb throttle or pedal-assist? It’s a personal preference. I went with both!
| Component | Function | My Personal Takeaway |
|---|---|---|
| Electric Motor | Provides the propulsion (the “e” in e-bike). | This is your biggest choice—it defines the bike’s personality. |
| Battery & Charger | Stores and supplies the power. Determines your range. | Don’t cheap out here. A good battery is key to a reliable ride. |
| Controller | The “brain” that regulates power from the battery to the motor. | A smooth controller makes for a smooth, predictable ride. |
| Throttle/Sensors | Your interface for controlling the motor’s power. | Thumb throttle or pedal-assist? It’s a personal preference. I went with both! |
Ready to Electrify Your Ride?
See how a simple kit can completely change your relationship with cycling and your city.
⚙️ Mid Drive vs Hub Motor — Which Conversion Kit Is Better?
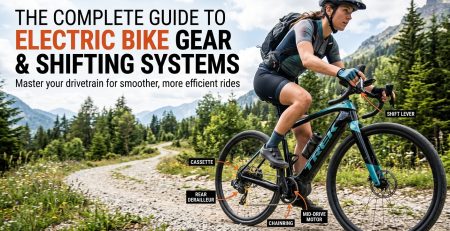
After deciding to build my motorized bicycle, I faced a major choice: mid-drive or hub motor? A hub motor sits in the center of a wheel. In contrast, a mid-drive ebike kit places the motor near the pedals to power the drivetrain directly. Both styles have strong supporters.
I researched for hours on forums and watched videos. Fans of hub motors love their simplicity and the direct push they provide. In contrast, mid-drive advocates praise the natural ride feel and superior hill-climbing ability that comes from the motor using the bike’s gears. For my hilly commute, the best option was becoming clear.

Visualizing the difference was key to my decision.
The Ultimate Showdown: Mid-Drive vs. Hub Motor
To help you decide, I made a comparison table based on my research and conversations with experienced riders. If you are undecided, this breakdown may be very helpful.
FactorMid-Drive MotorHub Motor (Rear/Front)PerformanceExcellent on hills; leverages bike’s gears for high torque and efficiency.Good on flat terrain; can struggle on very steep or long climbs.Ride FeelFeels natural, like having super-powered legs. Balanced weight distribution.Feels like being pushed or pulled. Can make the front or back feel heavy.InstallationMore complex; may require special tools to remove the bottom bracket.Simpler; involves replacing a wheel and mounting components.MaintenanceCan cause more wear on the chain and cassette.Largely self-contained, less stress on the bike’s drivetrain. Changing a flat is harder.Best ForMountain biking, serious commuters, and hilly areas.Urban commuting, flat terrains, and budget-conscious builders.
My Personal Insight: For anyone facing regular inclines, a mid drive electric bike is a game-changer. Shifting gears keeps the motor in its optimal RPM range. This allows you to conquer hills that would stall a hub motor, all while using the battery more efficiently.
| Factor | Mid-Drive Motor | Hub Motor (Rear/Front) |
|---|---|---|
| Performance | Excellent on hills; leverages bike’s gears for high torque and efficiency. | Good on flat terrain; can struggle on very steep or long climbs. |
| Ride Feel | Feels natural, like having super-powered legs. Balanced weight distribution. | Feels like being pushed or pulled. Can make the front or back feel heavy. |
| Installation | More complex; may require special tools to remove the bottom bracket. | Simpler; involves replacing a wheel and mounting components. |
| Maintenance | Can cause more wear on the chain and cassette. | Largely self-contained, less stress on the bike’s drivetrain. Changing a flat is harder. |
| Best For | Mountain biking, serious commuters, and hilly areas. | Urban commuting, flat terrains, and budget-conscious builders. |
🔧 Step-by-Step Guide to Installing an Electric Bicycle Conversion Kit
The day my e-bike conversion kit arrived felt like a holiday. As I spread the components across my garage floor, I felt both excited and nervous. I reminded myself to take it one step at a time. Although every kit is slightly different, the process of converting a standard bike follows a predictable path.
Before you start, clean your bike thoroughly! Working on a clean bike is just more pleasant and professional. Here’s a simplified log of my installation adventure:
- Preparation and Mounting: My first task was removing the crank arms and bottom bracket to make way for the mid-drive motor. This was the most intimidating part, but a $20 tool and a good online tutorial made it surprisingly manageable. I carefully mounted the electric bike motor, ensuring it was secure.
- Battery Installation: Next, I mounted the battery cradle to the downtube’s water bottle bosses. It clicked into place perfectly. I chose a sleek, frame-mounted battery to keep the weight centered and low.
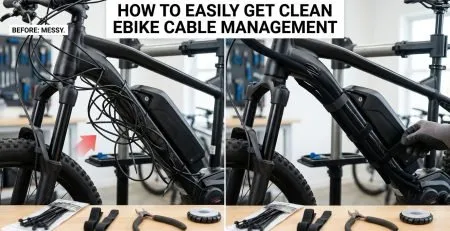
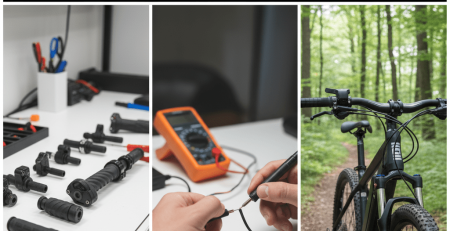
- Wiring the Brains: This involved routing cables for the speed sensor, throttle, and handlebar display. I also installed the brake levers, which include motor cut-off switches for safety. The key is to be patient and use plenty of zip ties for a clean, snag-free setup.
- Final Connections and Checks: With everything in place, I connected the battery to the controller and powered it on. The display lit up! It was a magical moment. I performed a lift-test (running the motor with the wheel off the ground) to ensure everything worked before my first real ride.
The finished product. The satisfaction was immense.
🔋 How to Choose the Right Motor Power and Battery Capacity
Choosing the right power wasn’t a guess; I had to think about my needs. Motor power, measured in Watts, affects your acceleration and hill-climbing ability. In contrast, battery capacity, measured in Amp-hours (Ah), determines how far you can ride on a single charge. A 250W motor is great for gentle assistance, whereas 750W or 1000W e-bike motors provide thrilling power.
I settled on a 750W mid-drive motor, which was perfect for conquering my hill without being overkill. To choose the battery, I calculated my 20-mile round-trip commute and added a 50% buffer. This simple math led me to a reliable 48V 17.5Ah battery that ensures I never run out of charge.
A Few Top-Rated Bicycle Motor Kits for DIY Riders
During my research, a few names kept popping up. While I chose a Bafang kit, these are excellent starting points for any aspiring builder.
EM3ev 36V 250-500W BBS02 Ebike Kit
Editor’s Rating: 4.7 / 5 ⭐⭐⭐⭐☆
A smooth and reliable mid-drive kit that is perfect for urban commuting, daily rides, and moderate hills.
EM3ev 48V 1000W BBSHD Ebike Motor Kit
Editor’s Rating: 4.9 / 5 ⭐⭐⭐⭐☆
A powerful mid-drive motor designed for steep climbs, long-distance touring, and high-performance e-bikes.
EM3ev 48V 750W BBS02 Ebike Kit With Battery Option
Editor’s Rating: 4.8 / 5 ⭐⭐⭐⭐☆
This popular mid-drive kit is a fantastic all-rounder. It offers great power for hills and can be installed on many different bike frames.
EM3ev 48V (13S4P) 21700 King Shark Ebike Battery
Editor’s Rating: 4.7 / 5 ⭐⭐⭐⭐☆
A high-capacity battery using premium-grade cells. It provides reliable, long-range power for any demanding motorized bicycle build.
Find the Perfect Motor for Your Bike
Explore different motor kits for bicycles and find the one that matches your riding style and terrain.
🛠️ Keeping Your Creation Running Smoothly
Building the bike was just the start; living with it is the real journey. A DIY electric bicycle needs regular care. Treat it well, and it will remain reliable for a long time. Here are a few things I learned in my first 500 miles.
Maintenance Tips for Ebike Kits
- Regular Bolt Checks: Vibrations can loosen motor mounting bolts over time. I do a quick check with a wrench every few weeks. It takes two minutes and provides great peace of mind.
- Battery Care is Crucial: Avoid leaving your battery fully charged or fully empty for long periods. I try to keep mine between 20% and 80% for daily use to maximize its lifespan. Never charge it in extreme temperatures.
- Keep it Clean: A clean drivetrain isn’t just for looks. On my mid drive ebike, a clean chain and cassette ensure smooth shifting and protect the motor from unnecessary strain.
- Listen to Your Bike: Any new clicks, whirs, or grinds are your bike’s way of talking to you. Investigate them early. Often, it’s a simple fix that prevents a major headache later.
Common Issues and How to Fix Them
One evening, my display flickered and died halfway home. I was worried, but a quick check in the garage revealed the problem: a loose power cable. A simple push and click fixed it instantly.
Don’t panic when things go wrong. Most issues are simple, like loose connections or misaligned sensors. Like any engine, your kit just needs consistent care.
❓ Your Questions Answered: FAQs About Motorized Bicycle Kits
When I tell people I converted my own bike, their eyes light up with questions. Here are the most common ones I get, answered from my own experience.
How much does an electric bicycle conversion kit typically cost?
A quality kit can cost anywhere from $400 to over $1,000, depending on the motor, power, and battery. My setup cost about $850, which saved me a lot compared to a pre-built e-bike.
How fast can a converted e-bike go?
This depends on the motor and local regulations. You can program most kits to follow local speed limits. While my 750W kit could go faster, I keep it capped to stay safe and legal.
Is it hard to install a motor kit for a bicycle?
If you’re comfortable with basic bike maintenance (like fixing a flat or adjusting brakes), you can do this. The key is patience and following a good tutorial. While installing a mid-drive kit is more involved, you can install a hub motor kit in as little as an hour or two.
A Quick Note on Safety: Always follow the manufacturer’s instructions carefully. Ensure all connections are secure and test your brakes thoroughly after installation. Be aware of and comply with your local laws regarding e-bike power and speed. Happy and safe riding!
This project was a game-changer. It turned a dreaded commute into the best part of my day and gave me the satisfaction of building something myself. If you are undecided, I hope my story helps you make a choice.
For more research, I recommend online communities like the Endless Sphere forums and resources like ElectricBikeReview.com. They offer in-depth tests and user feedback. (These are non-affiliated educational recommendations).


LEAVE A COMMENT